When capturing stormwater, you have several options. Area drains are easily placed in low spots to collect excess water and allow it to enter a drainage system. This works well when the grade of the land is easily altered, and a central low spot is either preexisting or easy to create. The question of how to capture stormwater when the area is either a preexisting or new impervious surface is best solved using a channel drain.
Channel Drains, also called Trench Drains, act as a gutter or perimeter drain for large volumes of sheet-flow runoff from hardscapes like driveways, pool decks, patios & plazas. They eliminate the need to grade a surface to a low-lying area. Most channel drains are neutral while some have built-in slopes that increase flow rates through the drainage system.
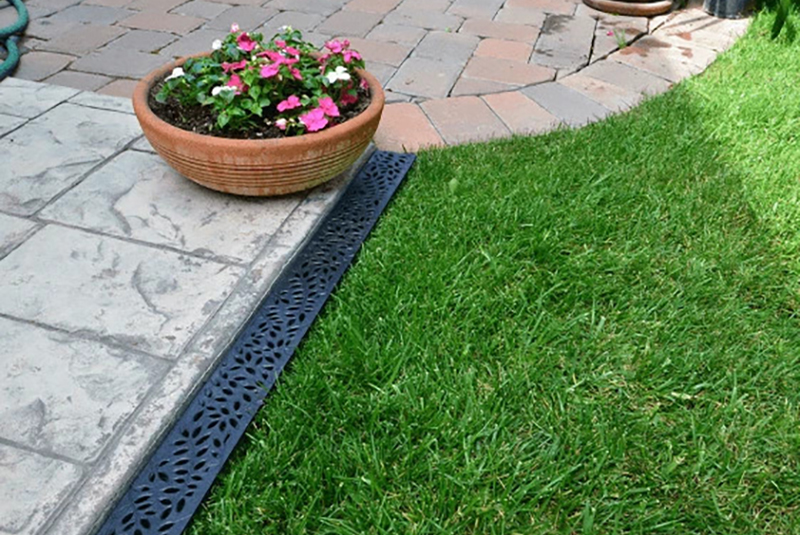
A common application of a channel drain can be seen below. The drain acts as an interceptor to prevent water from running into the garage. Since the drain is at the end of a impervious driveway, the drain collects the entire sheet flow of water and no modification of the driveway itself is necessary for the drain to perform effectively.
Sizing of Channel Drains
When choosing a Channel Drain, you have a variety of sizes to choose from. From 1 inch plastic through 12 inch concrete and larger, the sizes and material options are widely varying. In calculating the size you will need, we harken back to our friend from the last article, the rational formula. We have to calculate the area and rainfall intensity and account for the coefficient of runoff. This is same for any drainage sizing calculation and is a review from the previous article where we laid out how to size a drainage project.

Feel free to refer back in our library of drainage articles for a more detailed step by step instructions on how to calculate this and how to use the NDS drainage calculator. The link for that is below.
https://www.ndspro.com/tools-and-calculators/drainage-calculator
Once solved for Q, we need to divide that number by the length of the channel drain to come up with a Gallons per Minute (GPM) per foot for the length of the drain. See below example.

After establishing what the GPM per foot is, we have to make sure the outflow pipe can handle the volume of water, so the drain is not overwhelmed.
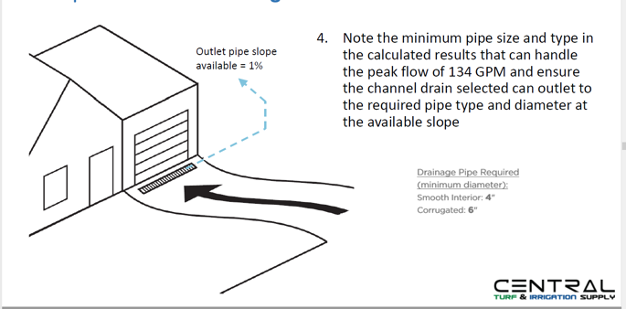
For this example, the volume of water is handled by a 4-inch smooth interior pipe. If you choose to use corrugated pipe, you will have to use 6 inch.
Refer to manufacturers specs to make sure the grates of the channel drains can handle the volume going into the drain. As a rule of thumb, most residential driveways can be handled by a 4–5-inch-wide channel drain, while many pool decks and patios can be handled by a 2-3inch wide drain.
Grates
The grate choice is a very important consideration when choosing a channel drain system. An abundance of choices is available for grate sections. Standard and decorative plastics, cast and ductile iron, stainless steel, galvanized steel and even brass for high end applications are all available. The important differentiator in choosing a grate is the load rating. Around a pool or patio, a pedestrian rated grate will work well. When choosing a grate for vehicular traffic, you want to ensure the grate can handle the weight of the vehicle driving over it. A heavy plastic grate may be fine for a family sedan, the same grate will be stressed by the weight of a full tri axle. Please refer to manufacturers specs to make sure you are choosing the right grate for the application.
Outlets
The outlet that connects to the pipe will be connected using either an end or bottom outlet. When using an end outlet, be sure there is enough over over the outlet where there is not possibility of it creating an issue with pavers, concrete or asphalt. Using a bottom outlet takes this worry out of the equation and allows for the drain to perform at its best as gravity carries all water to the lowest point of the drain.
Installation
If you take only one thing way from this article, let it be this. ALL CHANNEL DRAIN MUST BE INSTALLED IN CONCRETE AND THE GRATE NEEDS TO BE ON THE CHANNEL BEFORE POURING. The grates can be covered with painters’ tape to keep the concrete off them while the concrete is being installed to avoid staining. If the grates are not on when pouring, the weight of the concrete can warp the sides of the drain and make it impossible to get the grates back on.
Regardless of size and application, a single pour of concrete to encase the drain on the sides and bottom will insure the performance, durability and longevity of the drain. Always refer to manufacturers specs for the load you are looking to achieve. A general example is below for reference.

Finally,
At Central, we carry a full line of channel drains to complete your project. For product info, pricing and technical assistance please reach out to your local branch for help. We are your partner in drainage and success!